Implementation of Ansible on AWS EC2 Instance

I am excited to continue my learning journey in DevOps. I believe that DevOps is the future of software development, and I am excited to be a part of the movement.
Introduction
Ansible is an open-source automation platform that helps you to automate IT tasks across your infrastructure. It is a powerful tool that can be used to manage everything from servers to networks to applications.
In this blog, I will create 4 AWS EC2 Instances with 1 Instance being Master and the rest 3 Instances as its Nodes
Create an AWS account
To create an AWS Account visit AWS or look up my last blog
Create AWS EC2 Instance
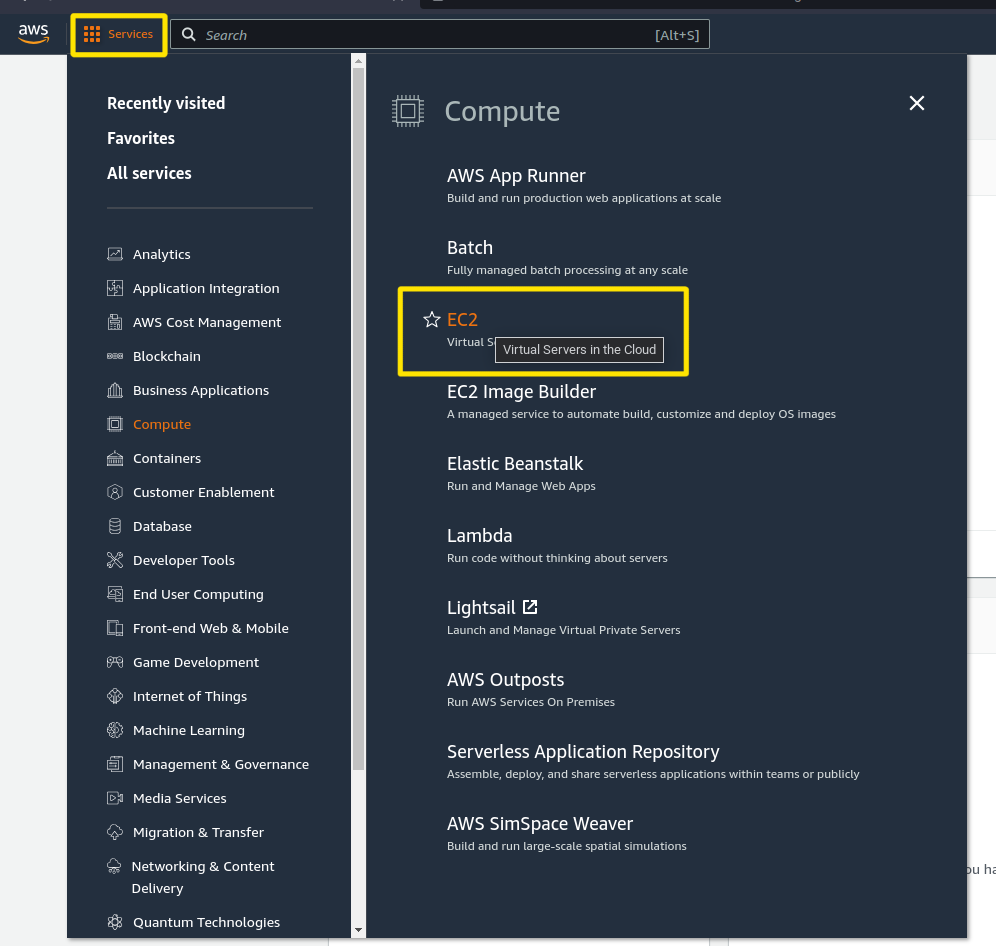
Once you are in, On the top left corner Go to Services -> compute -> EC2
Now let's configure our Instances
As shown below Select Launch insance

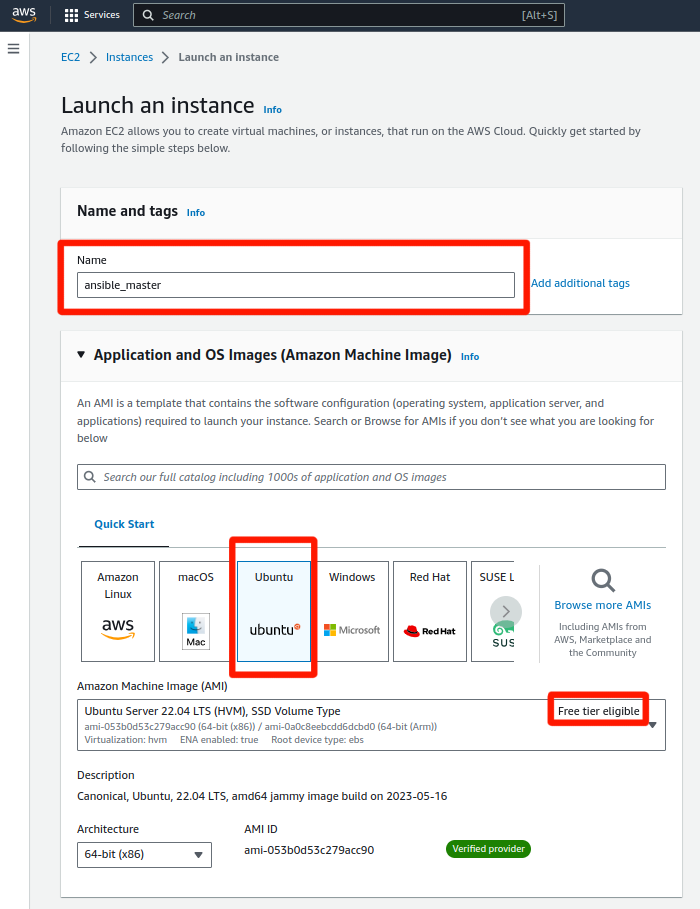
Now let's give a Name to your instance and select your operating server
For example Amazon Linux, Mac Os, Ubuntu, Windows, RedHat
Refer to below,
IMPORTANT: DO NOT CHANGE ANYTHING, let it be by default Let your AMI be
Free Tier eligibleselected
Now Create a Key Pair

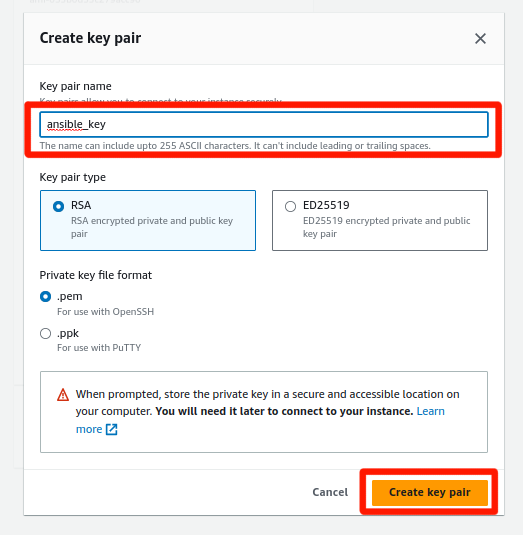
Save the Key pair on your system from where you can access it
After creating Key Pair type number of Instances to be created alongside
In our case we creating 1 Master and 3 Node we type 4
Refer Below,
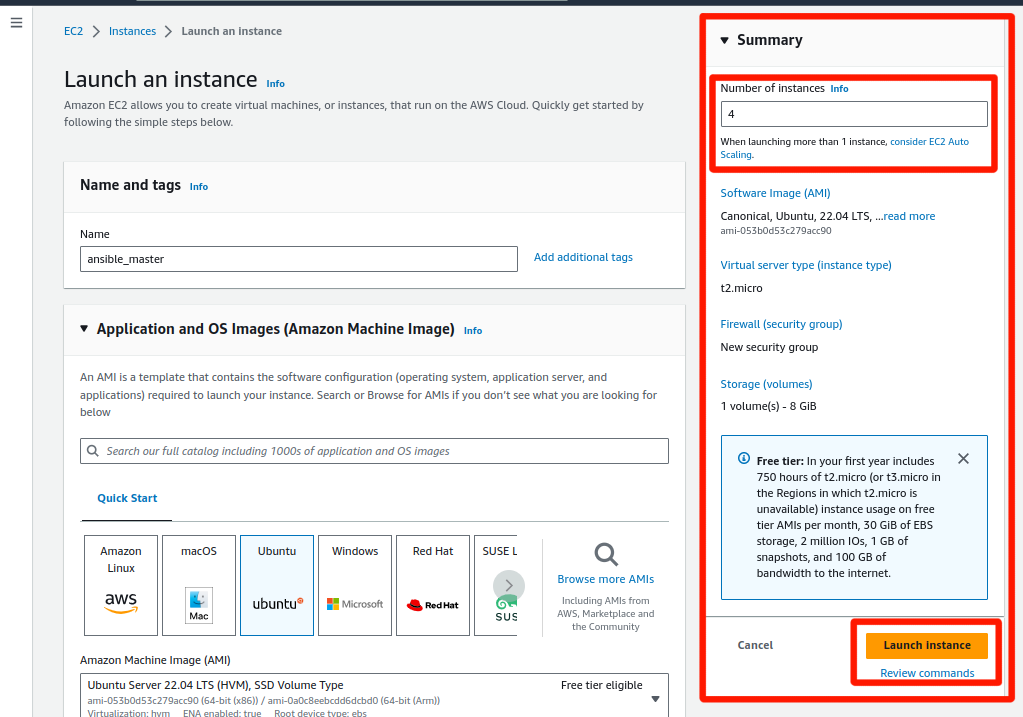
After completion of configuring Instances, Select Launce instance as shown above
You will get to see a Success Message

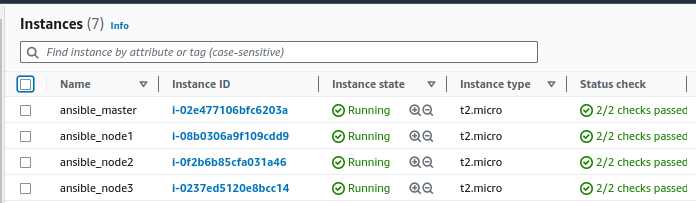
Instances Created
Once all the Instances are created rename them as shown below,
Select the ansible_master instance an click Connect as shown below,

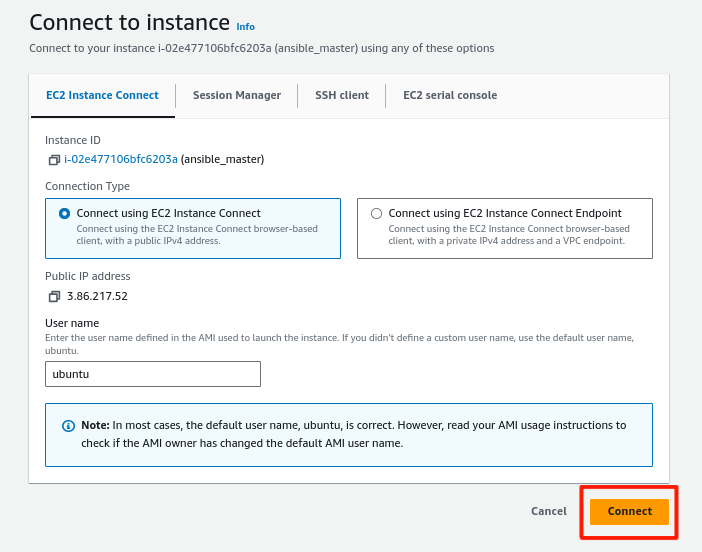
After connecting ansible_master you will be redirected to a new Tab with an console
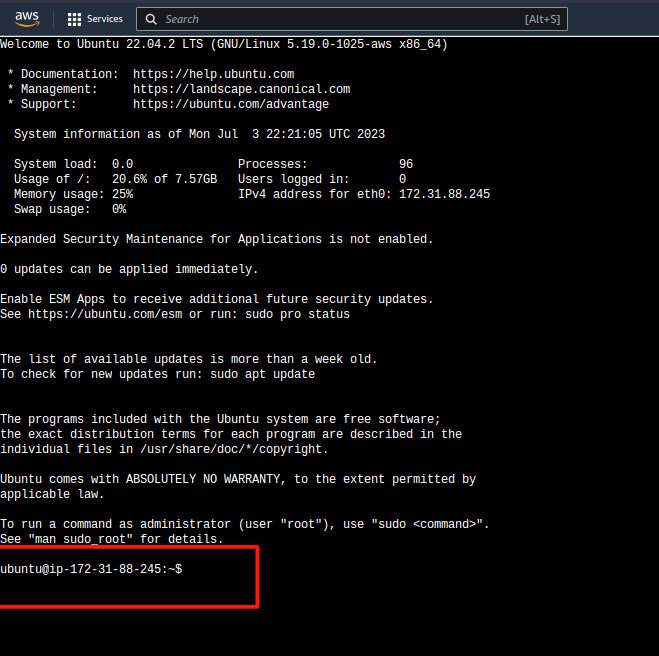
As you notice ubuntu@ip-172-31-88-245 is the master node you're inside
Now follow the commands to Install Ansible on this master node
Install Ansible on a Master node
- To install Ansible on a server,
sudo apt update
sudo apt install ansible -y
- Check the Ansible version
ansible --version
- After checking the version create an
ansible_keyin.sshdirectory
cd .ssh
vim ansible_key
Now recall the step where we created a
Key Pairearlier during Instance creationOpen the
ansible_key.pemyou downloaded on your system in VScode and Copy its content and Paste it in.ssh/ansible_keyYour
ansible_keywill look like this,
Paste the key into this new file just created using
vim ansible_keyon the serverAfter pasting the Key Tap
Escand type:wqto Save and Exit the file
Now copy the Public IP Address of your node1 and SSH into it using this command,
sudo ssh ubuntu@[ip adress] -i ~/.ssh/ansible_key
Replace
[ip address]with your node's IP
refer below,
After a succesfull SSH you will be inside your Node1

now exit the node using
exitcommand, go back to the master server
Now create an Inventory File inside your Master server
Inventory File: It defines the hosts and groups of hosts upon which commands, modules, and tasks in a playbook operate.
The default location for this file is
/etc/ansible/hosts
To check whether your Inventory File is available or not, Use this command,
cat /etc/ansible/hosts
You will get the output as ->
cat: /etc/ansible/hosts: No such file or directory
Now let's create our Inventory File in /ansible/hosts
mkdir ansible
cd ansible
vim hosts
You will see an empty file opened up in front of you
Now Let's add some servers information inside the newly created Inventory File,
#ip address below are public ip of 3 nodes
[servers]
server1 ansible_host=54.86.187.96
server2 ansible_host=54.237.129.81
server3 ansible_host=3.83.135.247

[all:vars]
ansible_python_interpreter=/usr/bin/python3
Check your Inventory file validity using
ansible-inventory --list -y
By default, it will check for the file in
/etc/ansible/hostsyou won't see any children
run pwd command to check your present working directory, in this case, its /home/ubuntu/ansible
so now the command will be,
ansible-inventory --list -y -i /home/ubuntu/ansible/hosts
You will get an output like this
all:
  children:
    servers:
      hosts:
        server1:
          ansible_host: 13.234.213.104
          ansible_python_interpreter: /usr/bin/python3
        server2:
          ansible_host: 15.206.75.26
          ansible_python_interpreter: /usr/bin/python3
        server3:
          ansible_host: 52.66.207.181
          ansible_python_interpreter: /usr/bin/python3
    ungrouped: {}
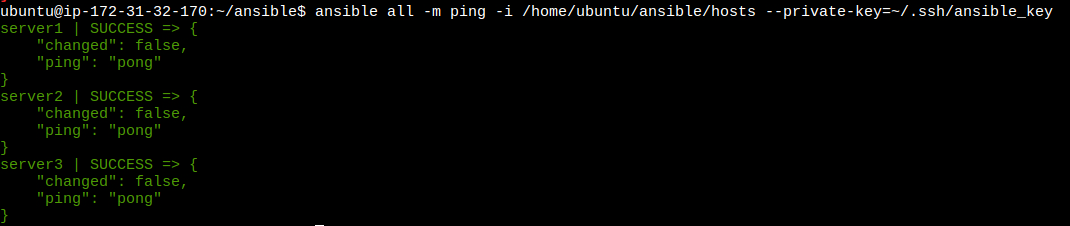
Now check for connect establishment on the client side, we will ping the servers
Before checking the connection make sure to give permission to your ~/.ssh and ~/.ssh/ansible_key
chmod 700 ~/.ssh
chmod 600 ~/.ssh/ansible_key
chmodis a command used for giving permissions to your Files and Folders likeread,write,execute
Now run this command,
ansible all -m ping -i /home/ubuntu/ansible/hosts --private-key=~/.ssh/ansible_key
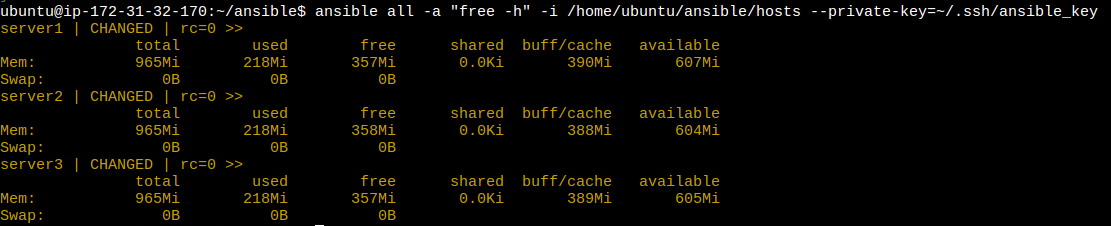
Now let's check the disk space of our servers
ansible all -a "free -h" -i /home/ubuntu/ansible/hosts --private-key=~/.ssh/ansible_key
Now Let's check the uptime of the servers
ansible all -a "uptime" -i /home/ubuntu/ansible/hosts --private-key=~/.ssh/ansible_key

DO NOT FORGET to Terminate all the Instances we created in this Hands-on after successfully done with implementation.
Congratulations you have successfully Implemented Ansible on AWS EC2 Instance
Further useful ansible commands,


